
Introduction
The Workiro - NetSuite Integration App, built on Celigo's integrator.io platform, enhances your integration between Workiro and NetSuite, and complements the Workiro SuiteApp by automatically sending records and documents from NetSuite to Workiro - helping you work with documents, get any work done, and communicate your work in a way that truly matters.
About the Integration App
Celigo Integration Apps contain 'flows'. Flows cater for specific integration capabilities, requirements and workflows.
The following flows are currently available for customers to enable in the Workiro - NetSuite Integration App.
Relationship record flows automatically create new records in Workiro when relationship records are created in NetSuite - providing you with a 'magic folder' in which you can work on, for or with others in service of the relationship.
- NetSuite Customer to Workiro Connection
- NetSuite Partner to Workiro Connection
- NetSuite Vendor to Workiro Connection
Transaction document flows automatically store PDF copies of documents against the corresponding relationship record in Workiro when transactions are created, edited or approved in NetSuite - keeping you organised and providing powerful but simple communication, tasks and signatures for any of your documents.
- NetSuite Credit Memo to Workiro Document
- NetSuite Invoice to Workiro Document
- NetSuite Sales Order to Workiro Document
- NetSuite Purchase Order to Workiro Document
We're looking forward to extending the capabilities of the Integration App - please let us know your needs via the Feedback area in the Workiro app.
Pre-requisites
Before installing and configuring the Celigo Integration App, you'll need to complete the following steps:
- Purchase an appropriate subscription for Workiro
- Purchase an appropriate subscription for Workiro and the GetBusy - NetSuite Integration App
- Create your Workiro account
- Configure your Workiro account to support the NetSuite Hybrid Suite App
All actions performed by Celigo in Workiro, such as creating connections and storing documents, are performed using a specific user identity within your Workiro team. We recommend creating a dedicated Celigo user in your Workiro team account for security and auditing purposes. We recommend you call this user Celigo Integration and add it to your team with a dedicated email address, such as celigo@yourdomain.com, and apply a unique secure password.
We further recommend following guidance issued by Celigo to create a dedicated Celigo Integration NetSuite user.
Installation
The Workiro Customer Success Team will assist you with the installation and configuration of the Integration App detailed in this article.
Installation pre-requisites
Before installing and configuring the Integration App, you must ensure that you have completed the following steps:
- Configure your Workiro account to support the NetSuite Hybrid Suite App
- Create a folder called GetBusy in the root of NetSuite File Cabinet
- Create a folder called Resources within the newly created GetBusy folder in NetSuite File Cabinet
- Verify that you can browse to the NetSuite File Cabinet folder path GetBusy/Resources
- Upload the file GetBusy.generateTransactionDocument.closure.js to GetBusy/Resources in NetSuite File Cabinet
Install the Integration App
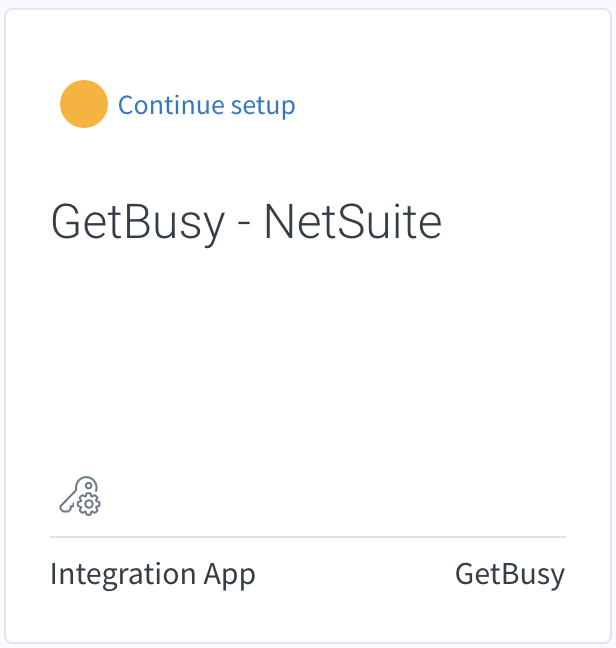
The GetBusy - NetSuite Integration App can be installed from the Celigo Marketplace once your Celigo account has been granted a license for the GetBusy - NetSuite Integration App.
You can locate the GetBusy - NetSuite Integration App in the NetSuite section of the Integrator.io marketplace, or by visiting https://integrator.io/marketplace/netsuite
Your GetBusy - NetSuite Integration App license will be granted to the email address associated with your Celigo account owner. When signed into Integrator.io with your owner account, the Install option will be available on the Celigo Marketplace tile for the Integration App.
Click Install.
Post installation setup
Following installation of the GetBusy - NetSuite Integration App from the Celigo Integrator.io Marketplace, you will be prompted to perform some setup steps in order to connect the Integration App to both GetBusy and NetSuite.
Click on the newly installed Integration App to access the installation setup wizard.
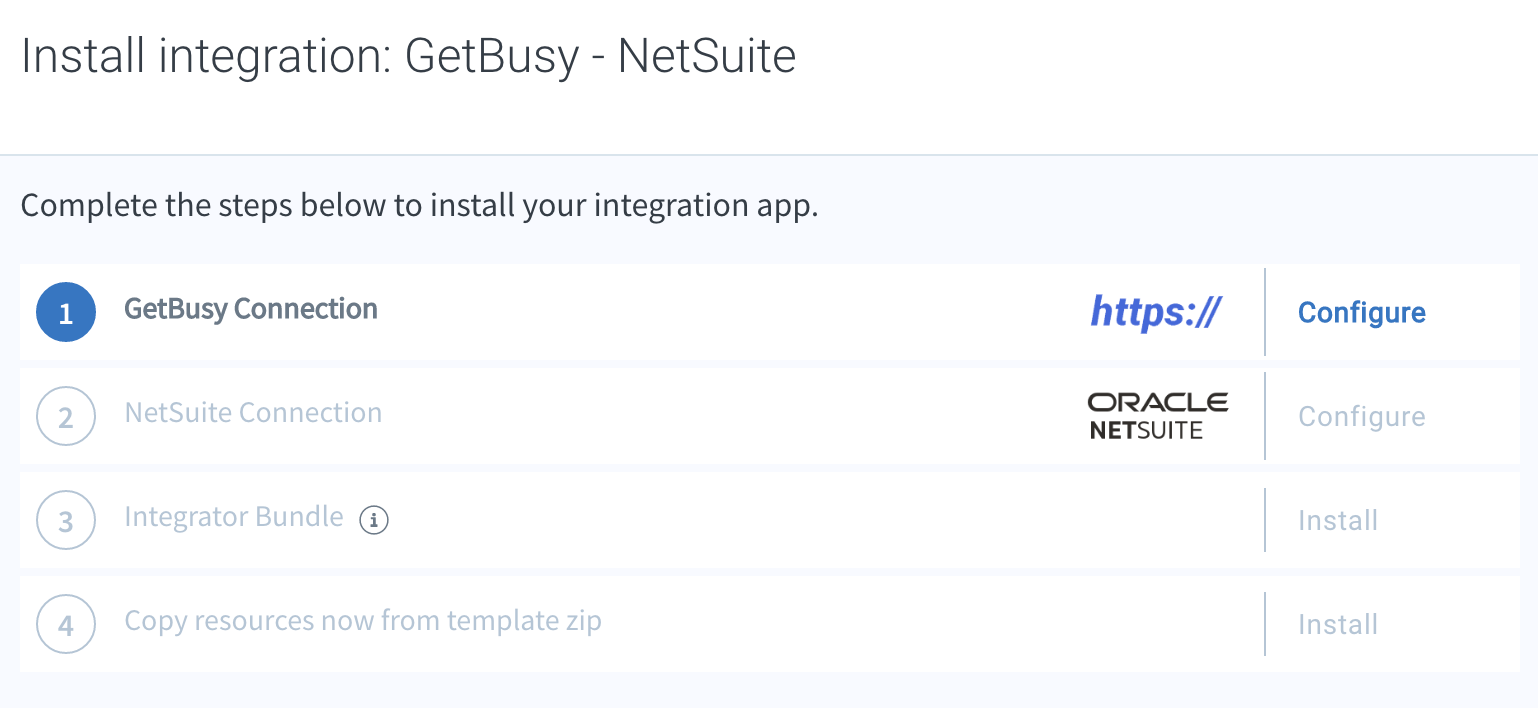
Step 1: GetBusy Connection
Click the Configure button adjacent to Step 1 (GetBusy Connection).
You will be prompted to configure a new connection to GetBusy in the Set up connection slide-out.
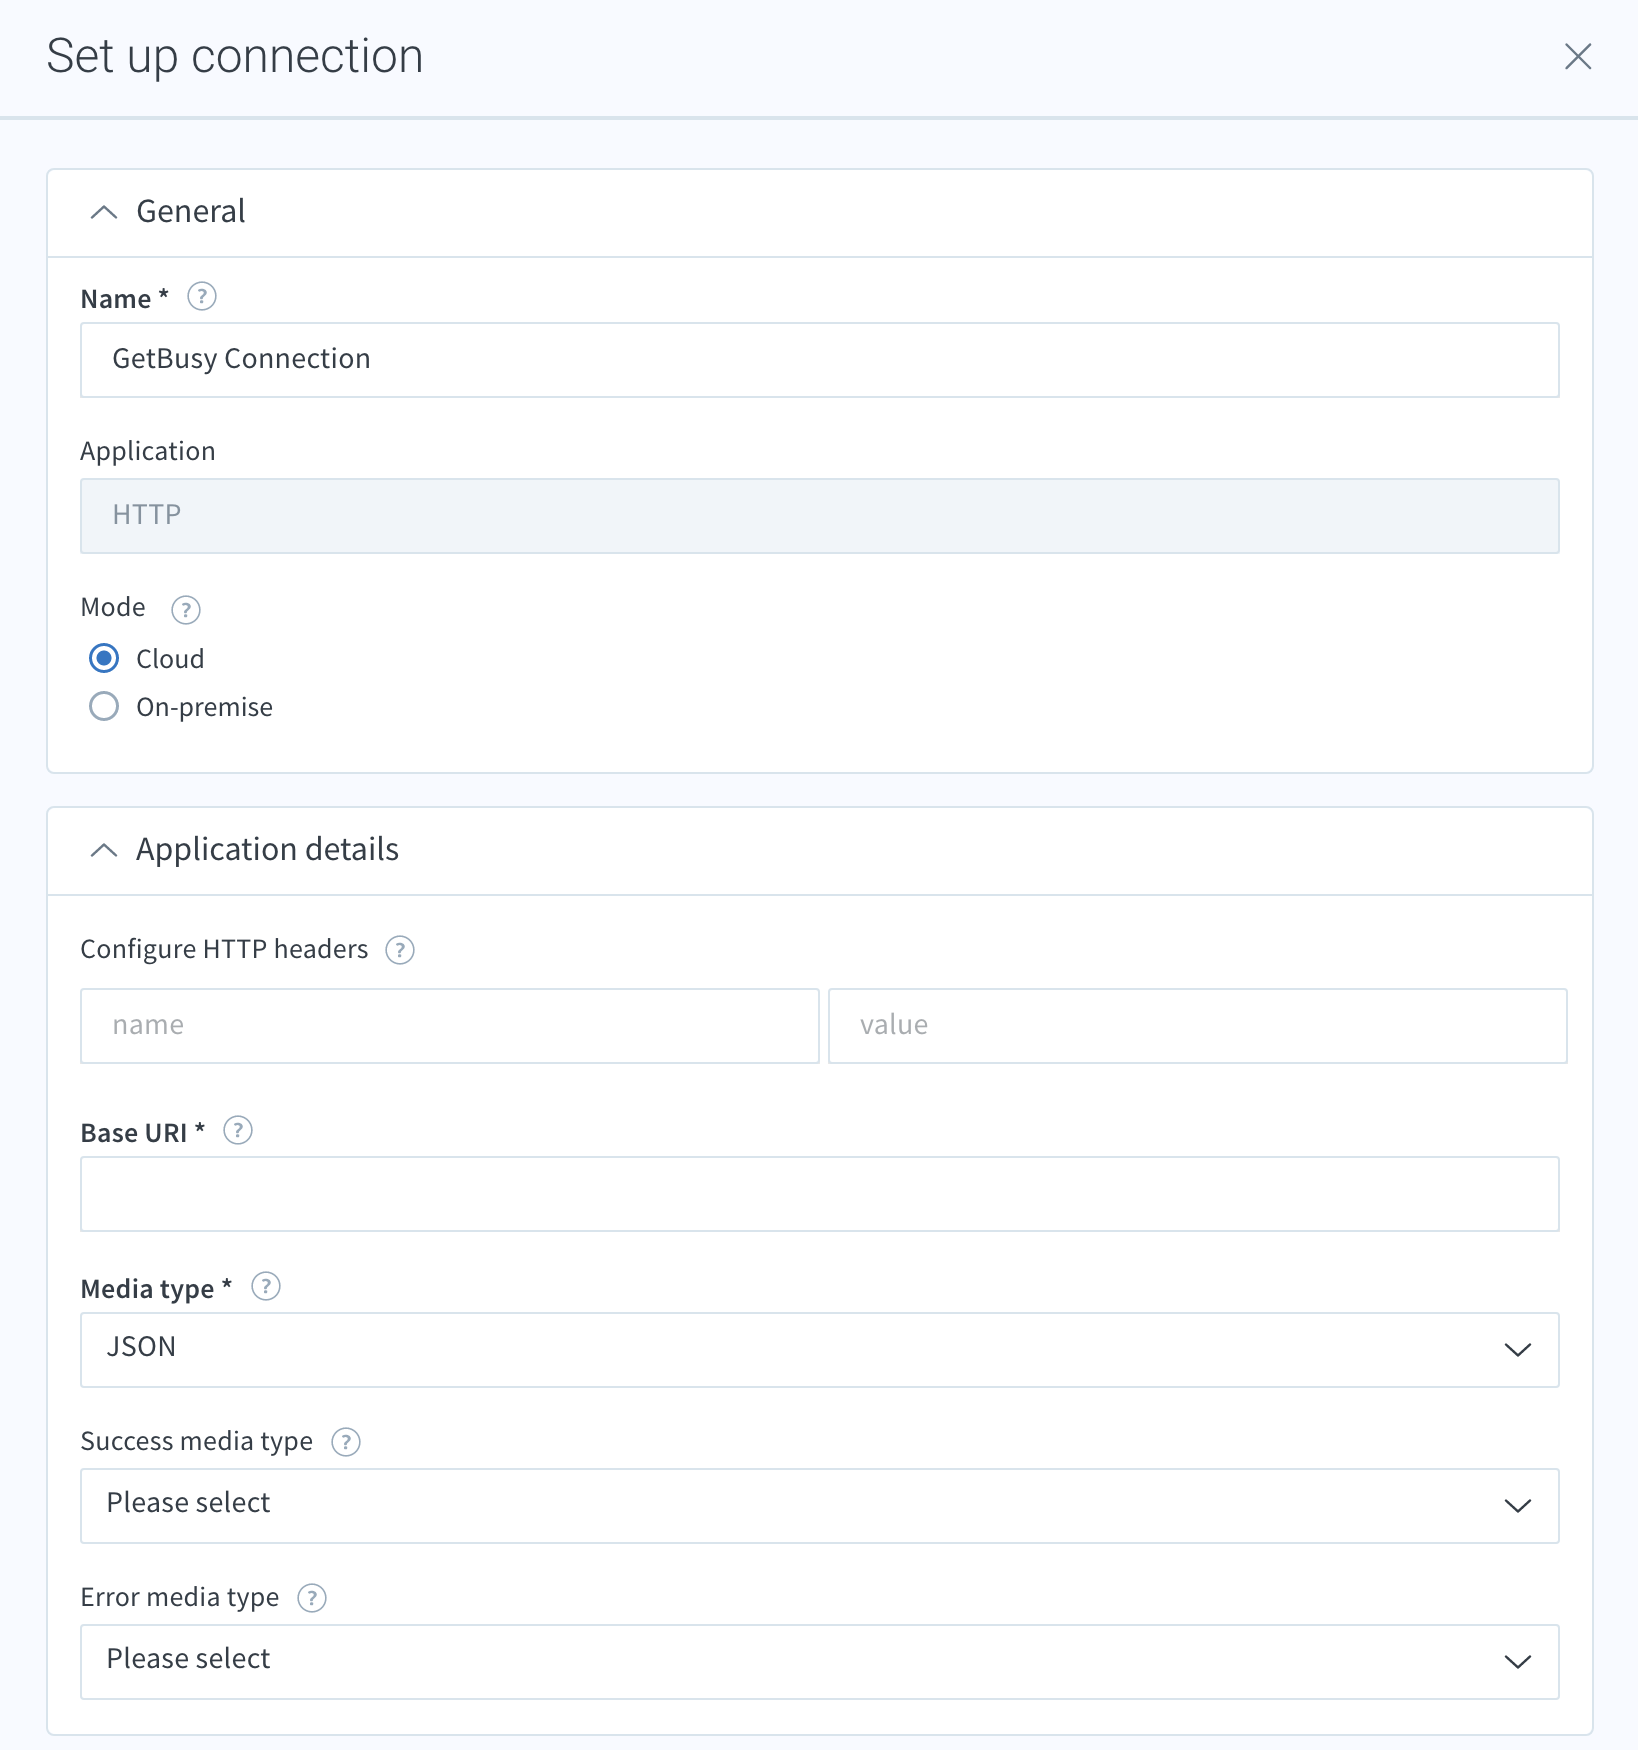
In order to complete the connection setup and successfully connect to GetBusy, you will need to change/update the following fields.
Any fields not referenced below should remain unchanged.
| Application details | |
| Base URI | https://api.getbusy.com |
| Success media type | JSON |
| Error media type | JSON |
| Configure authentication | |
| Auth type |
OAuth 2.0 |
| Configure OAuth 2.0 | |
| OAuth 2.0 client |
GetBusy Production iClient [GetBusy - NetSuite Integration App] |
|
Grant type |
Authorization code |
| Authorization URL |
https://identity.getbusy.com/identity/connect/authorize |
| Scope |
openid conversationsmanagement offline_access |
| Access token URL |
https://identity.getbusy.com/identity/connect/token |
| Configure token auth | |
| Send token via |
HTTP Header |
| Header name |
Authorization |
| Header scheme |
Bearer |
Once the above fields have been updated, click Save & authorize in order to complete the connection setup.
N.B. If the current browser session already has an authenticated GetBusy web app session, Celigo will authorize the new connection using the user identity of the current session automatically. Otherwise, Celigo will display a pop-up requesting GetBusy user credentials.
The user credentials used to authorise the GetBusy Connection will be used to perform all GetBusy actions for all flows.
Step 2: NetSuite Connection
Click the Configure button adjacent to Step 2 (NetSuite Connection).

You will be prompted to configure a new connection to NetSuite in the Set up connection slide-out.
In order to complete the connection setup and successfully connect to NetSuite, you will need to change/update the following fields.
Any fields not referenced below should remain unchanged.
| Application details | |
| Authentication type | Token Based Auth (Automatic) |
| Account ID | {Account ID of the target NetSuite instance in format AAAAAA0000000} |
| IClient | NetSuite iClient [GetBusy - NetSuite Integration App] |
Once the above fields have been updated, click Save & authorize in order to complete the connection setup.
N.B. If the current browser session already has an authenticated NewSuite web app session, Celigo will authorize the new connection using the user identity of the current session automatically. Otherwise, Celigo will display a pop-up requesting NetSuite user credentials.
The user credentials used to authorise the GetBusy Connection will be used to perform all GetBusy actions for all flows.
NetSuite accounts and users with enforced 2FA
Depending on the configuration of your NetSuite instance, it may be necessary to configure a NetSuite Access Token in order to successfully connect the GetBusy - NetSuite Integration App to NetSuite. This may be required to bypass 2FA settings for the user with which you wish to connect to NetSuite.
- Within NetSuite, create a new NetSuite Access Token using for the GetBusy NetSuite Celigo Integration App NetSuite Integration and the Celigo Integration NetSuite user.
- Ensure the Celigo Integration user has been attributed with a custom instance of the integrator.io role Celigo integrator.io Full Access w/o 2FA.
- Use Token Based Auth (Manual) along with the following settings when configuring the NetSuite connection for the GetBusy - NetSuite Integration App.
| Application details | |
| Authentication type | Token Based Auth (Manual) |
| Account ID | {Account ID of the target NetSuite instance in format AAAAAA0000000} |
| Token ID | {Your new NetSuite token id} |
| Token secret | {Your new NetSuite token secret} |
| IClient | NetSuite iClient [GetBusy - NetSuite Integration App] |
Step 3: Integrator Bundle
In order for Celigo to fully connect to NetSuite, the Integrator.io bundle must be installed within the target NetSuite account.
Click the Install button adjacent to Step 3 (Integrator Bundle).

You will be navigated to the bundle installation page in the NetSuite web app

Click the Install button and read and agree to any further prompts or terms.
Followed by a brief wait (indicated by pending web page activity), you will be presented with Preview Bundle Install page which lists the bundles contents.
Click Install Bundle and accept the confirmation prompt.
Bundle installation may a few minutes. You can monitor installation progress on the Installed Bundles page in NetSuite.
Once the bundle installation has completed, you can click Verify now, adjacent to Step 3 in the Integration App setup.

More information about the integrator.io bundle can be found in the Celigo documentation.
Step 4: Copy resources from template zip
The final stage in the Integration App installation and setup process, clicking the Install button adjacent to Step 4, will copy all of the remaining Integration app assets into the Celigo account.

Configuration
Following installation of the Integration App, the following steps should be performed.
- Verify / update the GetBusy Relationship Type Settings via the Integration App Settings -> General. These should only be changed on the advice of the GetBusy Customer Success Team.

- Enable the required flows
- Verify that the enabled flows are working as expected.
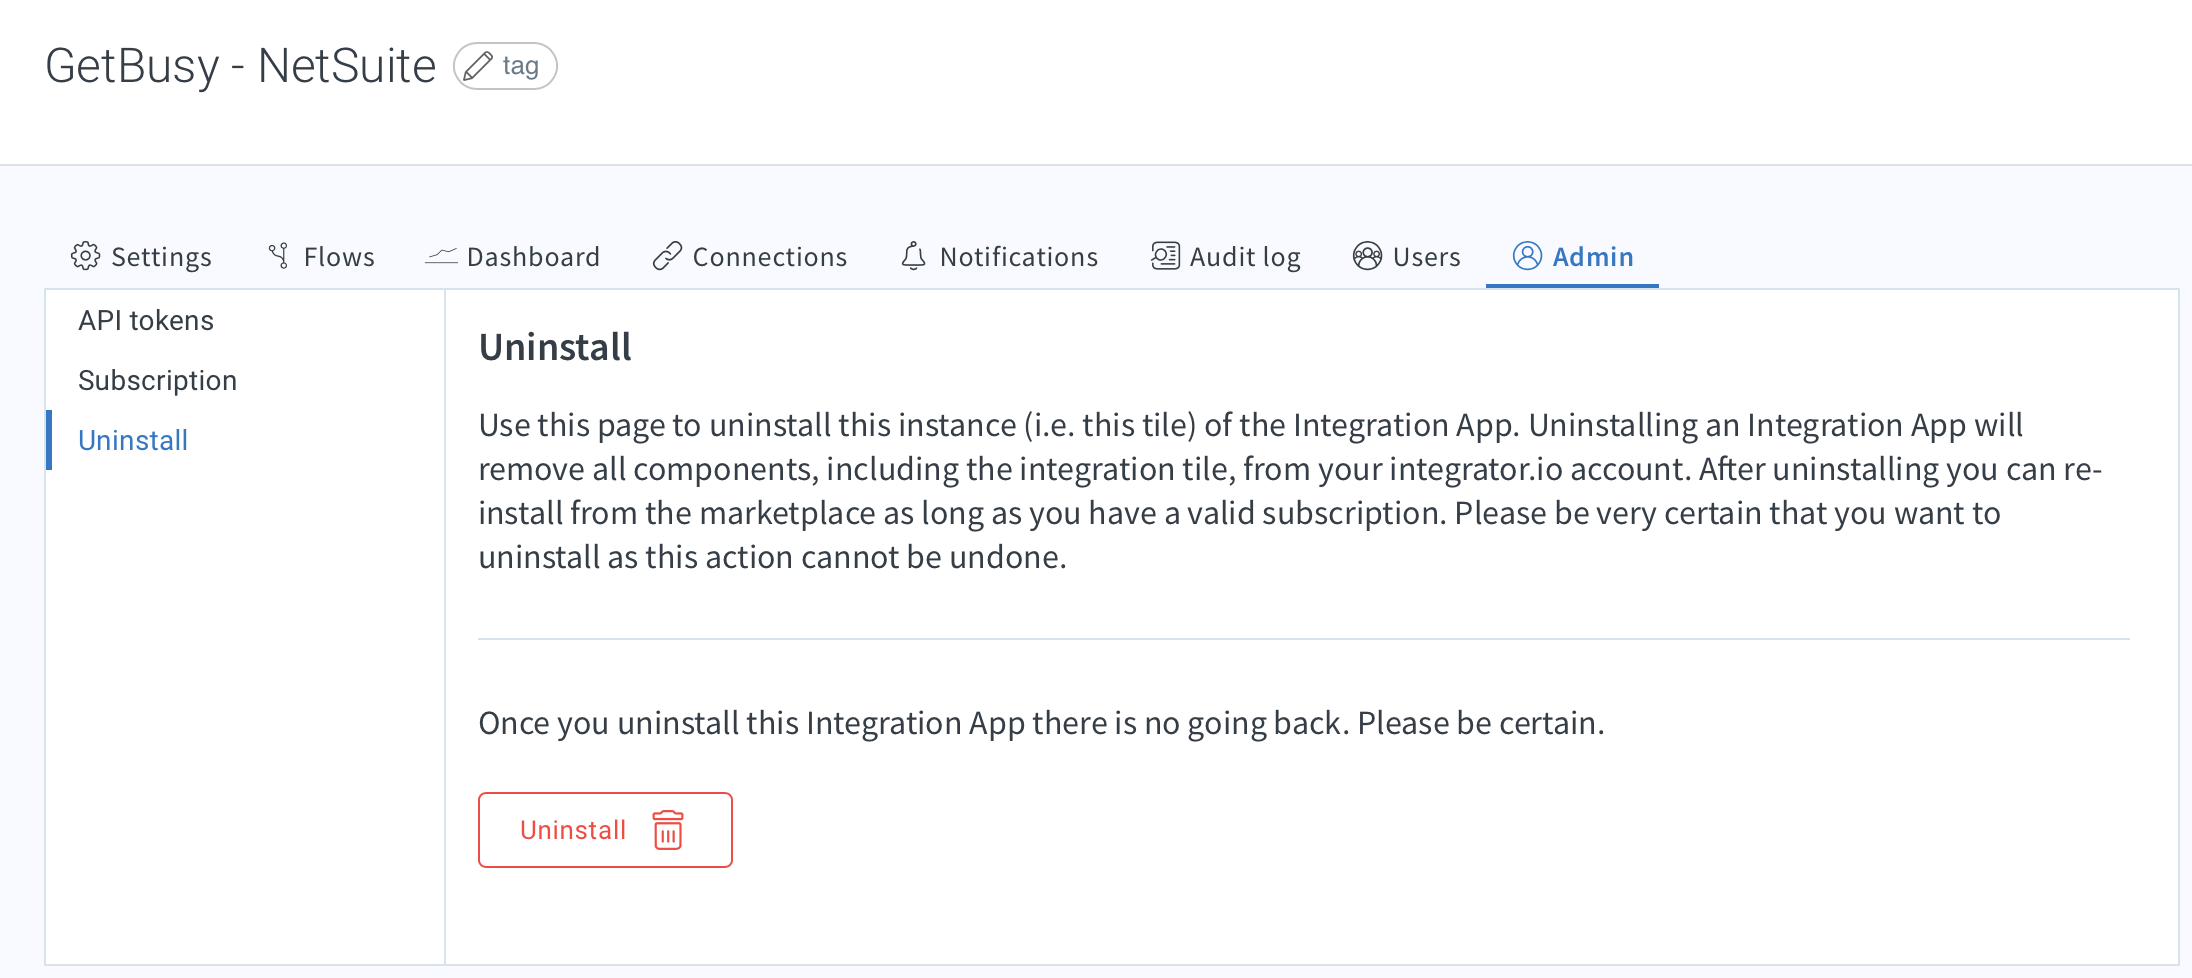
Uninstall the Integration App
Open the Integration App and navigate to the Admin tab.
Click Uninstall.
Comments
0 comments
Article is closed for comments.